How to Write for Business – Part 1

How to Write for Business by RightSaidJamesHere’s a fact:

There’s no quick fixes or magic formula for writing business documents.

Like it or not, your reports, presentations, briefs, proposals, even your emails, will always take longer to write than you want them to.
But is that such a bad thing?

Think about it for a moment. Imagine if your favourite book was written by following, rule-by-rule, a guide called 10 Steps to Writing Success*, and that it was published immediately without any edits, rewrites or changes of any kind.
Would you still want to read it?

The problem with formulas is that they always produce predictable results. It doesn’t matter how good a writer you are, or how many times you’ve written in the same style or for the same purpose: for maximum impact, every new thing you write should be approached with a fresh perspective. You might not know it, but if you write as part of your job, you’re an artist. As an artist, you should give your craft the time and respect it deserves. Of course, sometimes the bare minimum will do just fine, and a copy-paste job might get you the results you need. But what if you could get better results? What difference would that make to your success rate, or your company’s profits? With this in mind, I proudly present:

*drumroll*

The RightSaidJames Guide to Effective Business Writing

But before I go any further, I’d like to say this:

This guide isn’t perfect. It’s not going to suit everyone’s needs, and it almost definitely won’t get me a book deal. I heartily encourage you to tear it apart, throw it away or write your own version instead! All this guide consists of is a clearly defined process for creating a focused, well-written business document. “Should I follow this process every single time?”, I hear you ask. No, of course not; we all have to pick our battles and focus our time on what’s most important, and there’s no shame in reusing or tweaking old content if we’re convinced that it will meet the requirements of the task. With all that said, let’s get started.

1. Define the purpose of the document first.

You should start this whole process by asking yourself a few questions:

  • Who is this document for? i.e. pick a target and stick to it.
    For example: your boss, a potential client, or a wider audience? Your choice of target should dictate your writing style, your tone and the level of prior knowledge that you can assume.
  • What are the key points that you want your reader(s) to know?
    Summarise these core messages into bullet points, then put these at the top of the document or put a Post-it on your monitor. Keep referring to these points throughout the writing process.
    Note: the more messages you have, the less effective each will be. If you need to get across more than a few core messages, write more than one document, not a longer one.
  • What do you want your reader(s) to do as a result of reading this?
    In an ideal world, every sentence or paragraph you write would result in all of its readers making a decision, or taking a specific action (e.g. giving you money), there and then. This probably isn’t the reality, but you should do everything you can to inform, reassure or convince them. Of course, it helps if you tell them what you want them to do. The worst they can do is say no, and in most cases that’s better than them saying nothing.

Key message: a document without a purpose will be poorly written and ineffective. Choose a goal, then stick to it.

2. Abandon the waterfall approach.

If you’re a coder, you’ll probably now what I mean by ‘waterfall approach‘. In software development lingo, this is when a programmer (or team of programmers) will start at the beginning and keep coding until the project is complete. This might sound logical, but in reality it wastes time and will only result in frustration for all involved. A better approach, therefore, is to break the project down into clearly defined parts, estimate the time taken for each part, then distribute your workload based on importance and the order in which each part will be needed. This approach is called Agile methodology, and is perhaps a topic for another blog post.

“But what does this have to do with writing?”

Well, as it happens, writing a document is a lot like writing a computer program. Both require planning, and in each case the end result will be much more than the sum of its parts. This means that starting with a title and introduction, writing the main content, then finishing with a conclusion, isn’t necessarily the best approach.

A common piece of advice given to students writing an essay is to write the introduction and conclusion together, then work on the bulk of the content, before finally tweaking your introduction and conclusion at the end. As a music student I found this approach worked well; I knew what I wanted to say, but not necessarily the fine details, so by writing the intro and conclusion first this would focus my research and ensure that my quotations, paraphrases and analyses that made up the bulk of my essay were strengthening my key messages.

“Do I need to write a plan?”

If you’re anything like me, you probably think that writing a plan is a waste of time. Why spend energy on writing a vague and incomplete document when you could be writing the real thing? Well, here’s the secret:

You can reuse most, if not all, of your plan’s content in the document itself!

My draft of this post (click the image to read it).

Here’s the draft of the post you’re reading now. Click the image if you want to read the whole thing.

Think about it this way: you’ve just had an idea for a blog post, or perhaps your boss wants you to report on a new market trend. Your head is starting to fill with concepts and clever phrases. The best thing to do, therefore, is to get all this goodness down on paper before you forget any of it. Take this blog post, for example: the idea came to me at about 1 am! I obviously wasn’t going to write the whole thing there and then, so click the image on the right to see what I wrote instead.

As you can see, not everything made the cut and in the end I decided to write two posts instead of one. But the fundamental structure is the same, and I’ve borrowed a few phrases, even whole sentences, from the plan. Would I have written it the same way if I’d jotted down a title and gone straight to bed? Probably not. Was writing a plan worth it? Yes, absolutely!

Key message: focus on the most important things first, and don’t worry about ordering and layout until you have to.

3. Be ruthless: cut what you don’t need.

This is the last point of this blog post, but I’m not finished yet. To read the rest, look out for part 2 soon.

No matter how hard you try, every major document you write will be longer than you want – it’s simply inevitable. English speakers are not known for being concise, and in many cases there simply isn’t an established word or phrase to replace the complex ideas you are communicating. Therefore you need to pick your battles. If a part of your document doesn’t help you achieve the goals you’ve decided upon, or is a repeat of something you’ve written elsewhere, cut it.

It’s very easy to get emotionally invested in inanimate objects that you’ve spent a lot of time with. Cars, for instance, or pairs of shoes. But much like the old banger or the tatty trainers, if something you’ve written provides no benefit, it needs to go. Save it in Evernote if you must but, left where it is, it will probably do more harm than good.

Key message: unnecessary content can prevent or discourage your audience from reading what’s important. Delete it and never look back.

That’s the end of Part 1. In Part 2 I’ll talk about being realistic in your expectations, the importance of presentation and seeking inspiration from others. Tell me what you think so far in the comments below, and please share this if you think it would be useful to people in your network. And, as always, thanks for reading!

*Editor’s Note: I didn’t check before publishing this post if 10 Steps to Writing Success is actually a real book. If it does exist, it may or may not be any good. I’ll leave that to you to decide.

Writing a Social Media Strategy – Part 1 (before you begin) – featuring Rhys Gregory

Rhys Gregory - Digital Marketing Specialist

Rhys Gregory is a Digital Marketing Specialist based in Cardiff, UK. He helps businesses use social media and digital technologies effectively, assisting with planning, strategy and development at every stage of the process. He is also an active blogger and a volunteer with Canton Social Media Surgery. You can visit his website, or connect with him on Twitter or LinkedIn.

This article is the first in a series of posts intended for small businesses (or their employees) who are thinking about using social media as part of their marketing activities. The posts assume a certain amount of basic knowledge of Twitter/Facebook/blogging etc. but you certainly won’t need to be a social media nerd like me to get the most out of it! Please do share these posts with anyone who might find it useful!

As some of you may know, I work for a small software company (LexAble) based in Cardiff as a ‘Marketing and Business Executive’. As the company’s first employee whose primary focus is Marketing, it’s been a fantastic opportunity to really hit the ground running, putting into practice my existing skills and learning new techniques along the way. As part of this I’ve written the company’s first social media strategy, outlining how (and, perhaps more importantly, why), we will use social media. So I thought I’d share a few tips based on my experiences. I’m also grateful to Rhys Gregory for his contributions to this post.

Before you begin

It’s very tempting to dive straight in, outlining in explicit detail the things that you’ll be tweeting about or how to present yourself on Facebook, but before you do it’s a good idea to consider the following:

  • What do you want to achieve?
    First thing’s first: social media is not a direct sales tool, and anyone who tries to use it for this purpose is doomed to fail. Furthermore, it’s often difficult to quantify in simple terms the benefits (financial or otherwise) that it will bring to your business. Therefore, in your social media policy you should outline how you want social media to benefit your business. Example aims could include:

    • Increasing awareness of your business and its activities.
    • Positioning your business as an authority or knowledge-holder in its field.
    • Connecting with new and existing customers.
    • Reducing the time or money that you spend on support and customer service.
    • Organically improving your search engine rankings.
  • Is social media right for your business?
    Unfortunately, not every business will be able to properly benefit from social media. Some factors to consider:

    • Do your customers use social media? If, as a general rule, they don’t, consider why that might be (e.g. age, income, social class, lifestyle). (But you should never just make assumptions – ask them instead!)
    • How about the potential customers that you haven’t reached yet? Think about the markets that you’ve yet to tap into and whether social media would be a good way to break into them.
    • Is social media an appropriate forum to talk about your product? Is there a way that you can create relevant and interesting content that other people will want to share or view?
  • How much time do you want to spend?
    Social media is often thought of as free, but remember that time spent using it is time that you’re not spending on other things. It’s therefore very important to clearly define how much time you and your colleagues will dedicate to it. Another issue with social media is that it’s not always possible to predict when you’ll be using it – you can check for replies and new followers (and respond to them) once a day, once an hour or once every 5 minutes. Pick a schedule that works best for you, and stick with it as much as possible.

To conclude this post, here’s some salient advice from Rhys:

It’s really important to set out objectives before doing anything, that way you can measure its success. You’ll need to consider how much time is involved, the cost, and who’s responsible for what. Do you have the necessary expertise, or do you need to bring in an external training or digital agency to help get you started? Your overall goal might be to increase brand awareness or even increase leads, but you’ll need to know exactly how you want to measure this.

Measurement tips:

  • Make everything trackable – You want to be able to measure the effectiveness of everything that you do. Use a service like Bit.ly to track the number of clicks on the links that you post. What type of content is most popular? Is there a best time to post? Example – http://bit.ly/linkedin-me+
  • Define a lead-process – For those businesses that want to generate leads from social media, and trust me that’s probably all of you, you’ll need to define a nurture-path. When someone clicks on your blog post link, what do they see on that page? Make sure you have clear call-to-actions (CTAs) that take the user to the next step. Whether that be signing up for your newsletter to continue the path, or hitting the contact us button.

This is the first part in a series of posts about developing a Social Media Strategy. If you’d like to be notified when the next post arrives, you can subscribe to my blog, follow me on Twitter, or leave a comment below so I can notify you manually!

Review: Drupal Gardens by Acquia (managed Drupal hosting)

Drupal Gardens

The Drupal Gardens homepage.

Believe it or not, my current job was gained off the back of a small web development project, which then turned into a full marketing project before I was invited to stay on permanently! My company’s website was originally hand-coded by our graphic designer (the talented Tayler from Blindspot Design), but, as the company had started to grow, my boss was finding it difficult to manually edit and add new pages, so he arranged for a GO Wales participant (me) to migrate the content and design over to a Content Management System. For this, we decided to use Drupal Gardens by Acquia. For those who haven’t heard of it, Drupal Gardens is a managed Drupal hosting service. This post outlines my experiences of using the service to build, launch and manage a medium-sized website.

The key benefits of Drupal Gardens are:

  • No need to worry about server/database configurations, load balancing or software upgrades – it’s all managed on your behalf.
  • WYSIWYG design editor – simply click on an element, define the properties (colour, background, border, position) and the CSS is written for you.
  • Fully extendable – you can override CSS properties and specify new classes, and plugins such as jQuery, Typekit web fonts and Google Analytics are fully supported.
  • Built-in social sharing tools  – again, you can bring your own if you want to do so.
  • If you ever want to migrate to self-hosted Drupal, you can easily export the site in its entirety and host it elsewhere – free of charge.
  • Fantastic FAQs, documentation and community forums for support and advice.

There are, however, a few important limitations:

  • You have no access (none, zero, zip, zilch) to the backend – so server-side includes, custom header elements and embedded PHP scripts are not supported. Still, there’s plenty of things you can achieve using JavaScript and external plugins, so it it’s not a deal-breaker if your coding needs aren’t too complex.
  • There is also less flexibility on Drupal plugins – many popular ones (and some custom-built options) are available, but requesting additional plugins is a slow process – you’re at the mercy of their to-do-list, which I’m told is rather long!
  • Likewise, the original CSS files for the base theme can’t be edited, which means that you sometimes have to do a bit of hackery if you want to remove/significantly alter the behaviour of a theme.
  • The HTML editor has a rather annoying habit of minifying your code so it isn’t human-readable – to combat this, you should always keep a copy of complex HTML/inline JavaScript for reference purposes and ease of editing.
  • It’s not currently possible to import Drupal themes (even ones created using Drupal Gardens), but they’re working on it.
  • Native e-commerce functionality is still in the pipeline, but alternative solutions include Cashie Commerce and E-junkie (we use the latter because our needs are simple and we’d prefer to pay a monthly fee rather than commission).

Design, Implementation and Launch

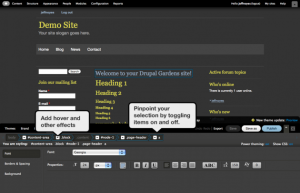
The Theme Builder in action

The Theme Builder in action

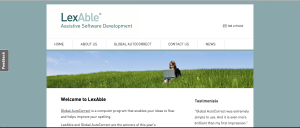
My brief for LexAble’s website was somewhat unusual; I had to migrate an existing hand-coded site over to Drupal Gardens, preserving both content and design.Often a new website means a complete overhaul, but as I was on a time-limited work experience placement this wasn’t an option. To achieve this migration, I chose a theme that was the best match for what I needed to achieve, then using the in-built WYSIWYG editor I slowly tweaked the colours, layout and functionality until it was nearly identical to the original website. One hurdle that I faced was the fiddliness of selecting the correct element to edit, but this was easily overcome by enabling the ‘power theming‘ option. The images below show the original site, the theme in its unedited state and how the website looks now.

The theme design I started with.

This is the Theme (Kenwood) that I used as a base for my design.

After I had got the appearance sorted, I started the process of migrating the content and functionality. This was for the most part a case of copy & paste, with a few adjustments to the HTML and CSS along the way. The most difficult part was getting the appearance of forms just right, which was made more complex because of existing CSS that was hard to override.

The LexAble website as it looks now.

The LexAble website as it looks now.

In terms of time spent at the design and implementation stage, I would estimate the following:

  • Adjusting base theme to match original design: 6 hours
  • Migrating basic content: 2 hours
  • Tweaking HTML and CSS: 10 hours
  • Migrating site functionality (e-commerce, forms etc.): 8 hours
  • SEO, Google Analytics, Typekit, AddThis etc.: 3 hours
  • Final tweaks and changes to design and content: 6 hours (not including time spent planning/writing)

Total time taken for entire project: 40 hours (again, not including planning, writing and time spent in meetings).

Site Management and Maintenance

Managing a Drupal Gardens site is much like managing any Drupal site, and it will be a familiar experience to anyone who has used WordPressJoomla and other CMS. Adding a new page is as simple as pressing the ‘add content’ button, giving it a name and URL then creating the content. If you pay for a Professional subscription or above, you also get access to SEO tools such as Open Graph, keywords (which are mostly pointless these days) and Google crawler settings, all of which can be edited on a per-page basis. Compared to self-hosted Drupal, there’s a lot less maintenance – small upgrades to security and functionality and the latest stable Drupal release are done automatically. Notice is given before each upgrade, and any downtime is either minimal (2 or 3 minutes) or non-existent. As a marketing professional, the handling of all the backend stuff is money well spent, allowing me to focus on improving the site and its content.

Verdict

For LexAble, Drupal Gardens is ideal. It takes away 90% of the hassle involved in managing a Drupal site, but there is great potential for customisation and extending functionality. For someone like me, who has excellent HTML/CSS skills but struggles with MySQL databases and server configuration, it’s ideal. At every stage of the process I felt able to do things my own way, and I was constantly surprised by all the extra touches that the Drupal Gardens team had added in. Another great benefit is that it’s always being improved – for instance they’ve recently added the ability to make your site’s design responsive, which is a must for every website these days.

There are a few drawbacks and quirks to Drupal Gardens, but none that can’t be overcome or worked around. And when I did get stuck, the Drupal Gardens team were only too happy to help!

All in all, I would highly recommend Drupal Gardens to individuals or small businesses who want a professional, modern website but don’t have the time, resources or ability to manage the backend stuff. Their prices are probably a little higher than your current web host, but the customer service and behind the scenes stuff is worth paying for.

Have you used Drupal Gardens, or a similar solution? What are the positives and negatives of this approach? Let me know in the comments.

Disclaimer: I have not received any tangible reward, financial or otherwise, from Drupal Gardens, Acqiua or anyone else for writing this post. Although if they’re reading this, I do quite like chocolate!